

Before you trade
Check the active profile, selected wallets, token address, chain, liquidity, and slippage. If several wallets are selected, check Spend type.Buy a token
1
Open the token
Paste its contract address or a supported token link into Cove. Select the intended chain if prompted.For an Arc token, select Arc and verify the chain and contract address on the panel before choosing an amount.
2
Choose Buying
Check the panel’s side. Open Buying if necessary.
3
Choose a size
Select a USD preset, $x for a custom amount, or a percentage preset if you use percentage mode. Percent buys use the selected wallets’ buying power.Max, when enabled, uses available buying power and always asks for confirmation.
4
Review any prompts
Confirm the buy if enabled. Read any scam warning, price-impact confirmation, or additional network fee before continuing.
5
Read the receipt
Progress moves through quoting, execution, and verification. Buy Executed confirms the fill. Check Spent, Received, and the wallet outcomes.
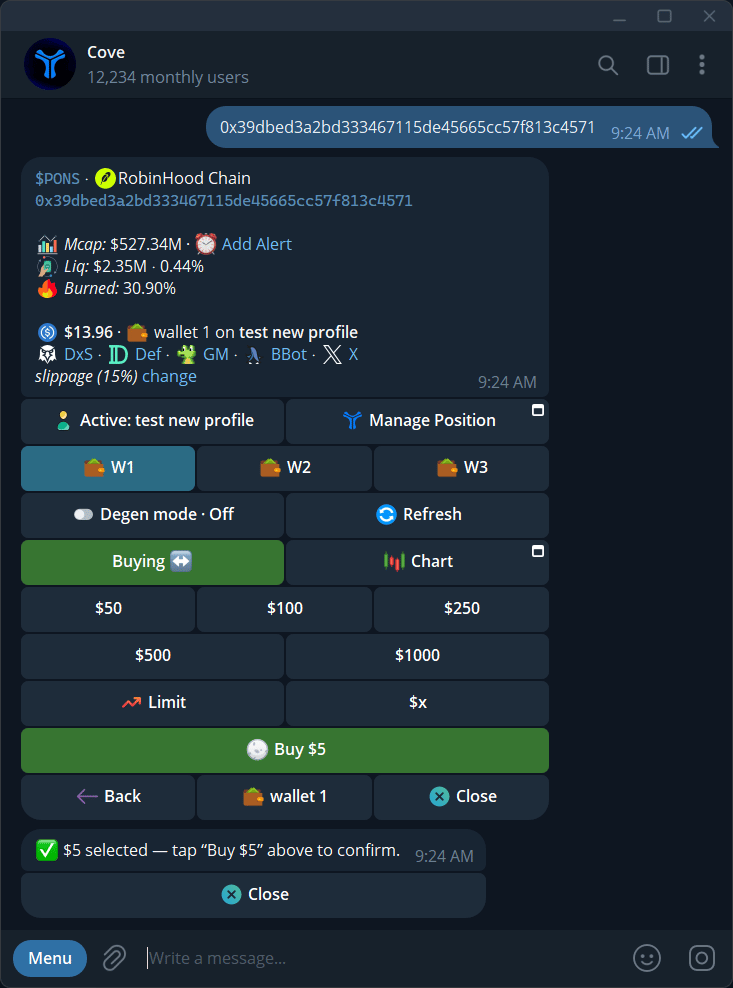
With Buy confirm enabled, review the selected amount before tapping Buy.
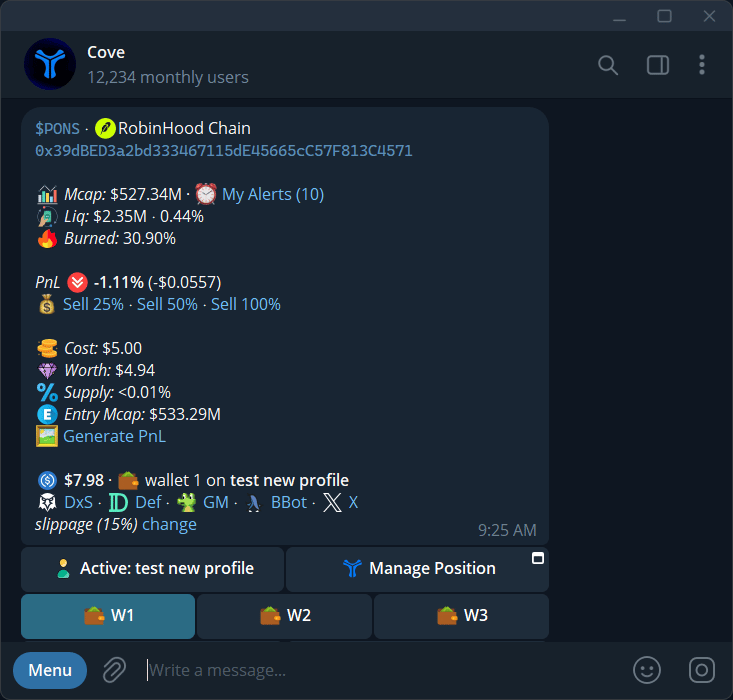
The updated token panel after a buy, showing cost, worth, and position PnL.
Sell a token
1
Open your holding
Send
/positions, check the profile, and tap the token.2
Choose Selling
Select 25%, 50%, 100%, x% for a custom percentage, or $x for a custom USD value.
3
Check the scope
With several wallets selected, a percentage applies to each wallet’s holding. USD sells require a single wallet.
4
Submit and check the result
Confirm if prompted. Wait for Sell Executed and check the USDC received. A full sell offers Generate PnL.
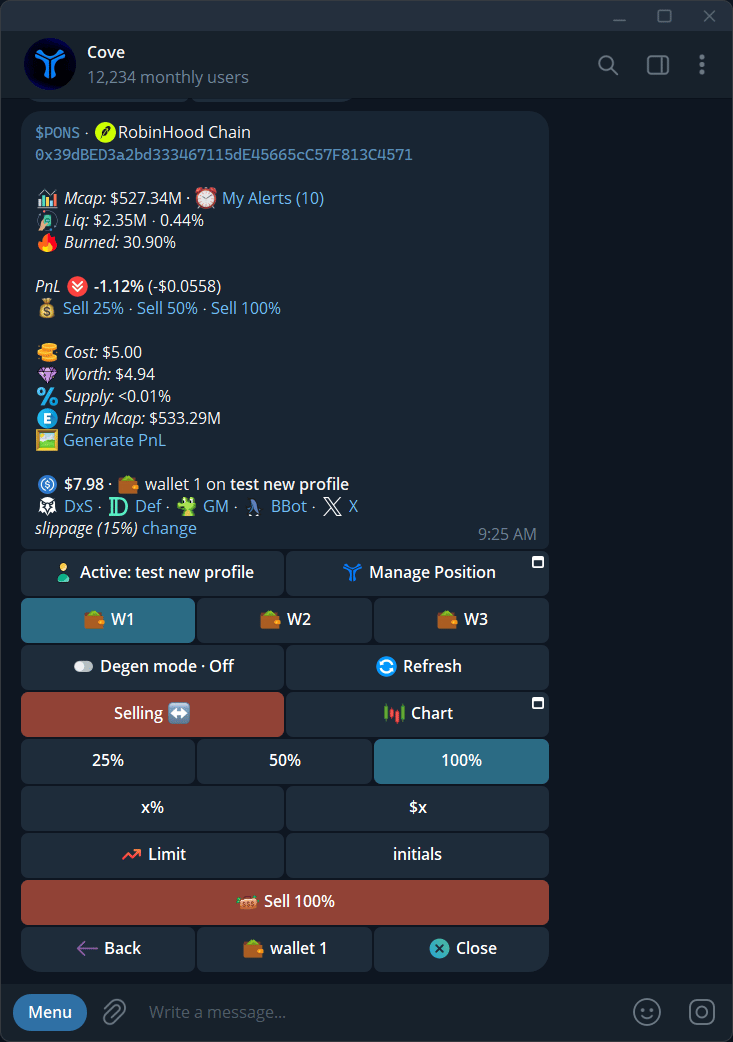
The Selling panel with percentage presets, custom size, initials, and a confirmation button.