Start the bot, fund a wallet, and follow a buy through to your positions.
Start the bot, add USDC on Solana, buy a token, and find it in your positions. Cove creates your first wallet for you; you do not need to create or import another one to get started.The same trading balance lets you buy tokens on Arc and other supported chains.To learn with virtual money first, use Paper trading.
Screenshots use different example accounts and tokens. Follow the steps in your own account and always copy your own deposit address. The amounts and settings shown are examples, not recommendations. Select an image to enlarge it.
1
Start Cove
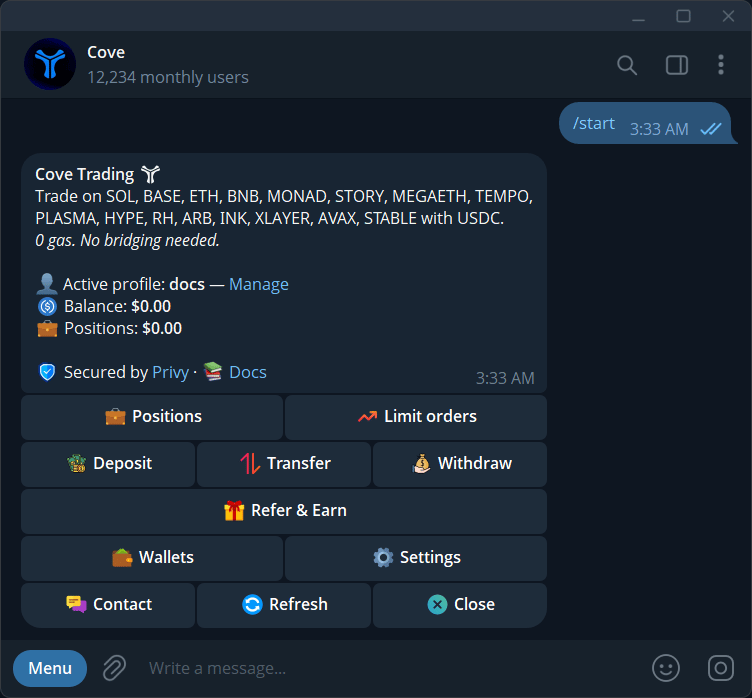
Open the Cove Trading bot in Telegram and tap Start, or send /start. Complete the age confirmation if shown.Cove creates your Main profile and a wallet. The main menu gives you access to Deposit, Positions, and Settings.
Cove's main menu with the active profile, balance, positions, and navigation buttons.
2
Deposit USDC on Solana
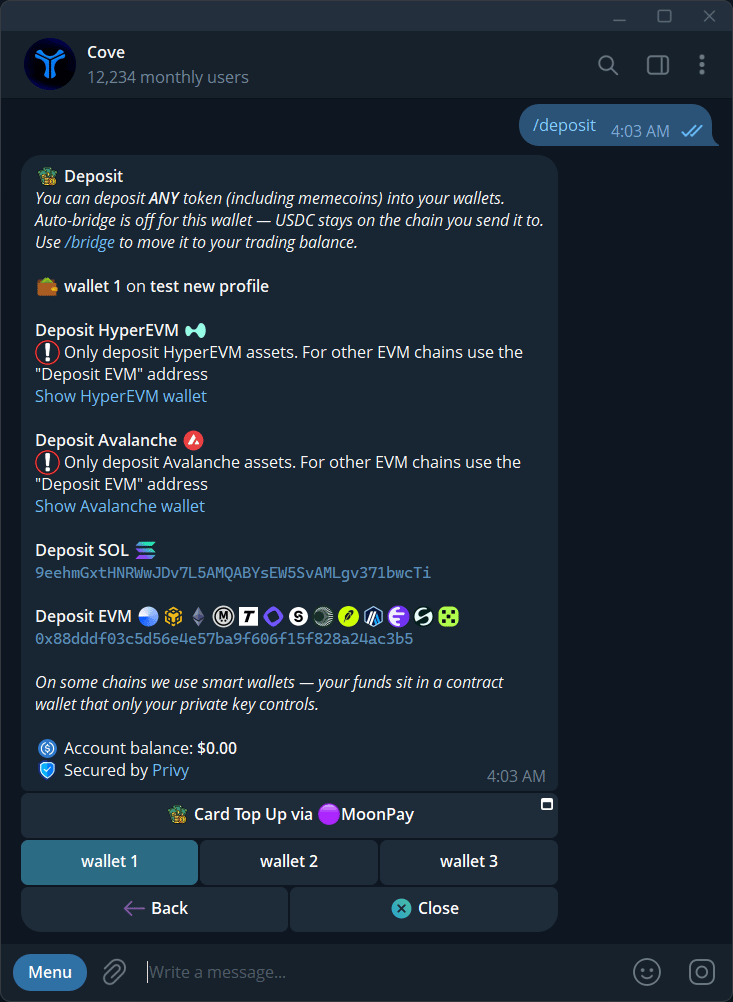
Tap Deposit or send /deposit. Copy your wallet’s address under Deposit SOL.In the wallet or exchange you are sending from, select USDC and the Solana network, then use that address. Deposit SOL labels the network address; for this guide, the asset you send is USDC.Wait for Deposit received, then send /start and check that Balance has increased before continuing. For other funding options, see Deposit funds.
Open Deposit and copy your own address under Deposit SOL to receive USDC on Solana.
3
Open a token
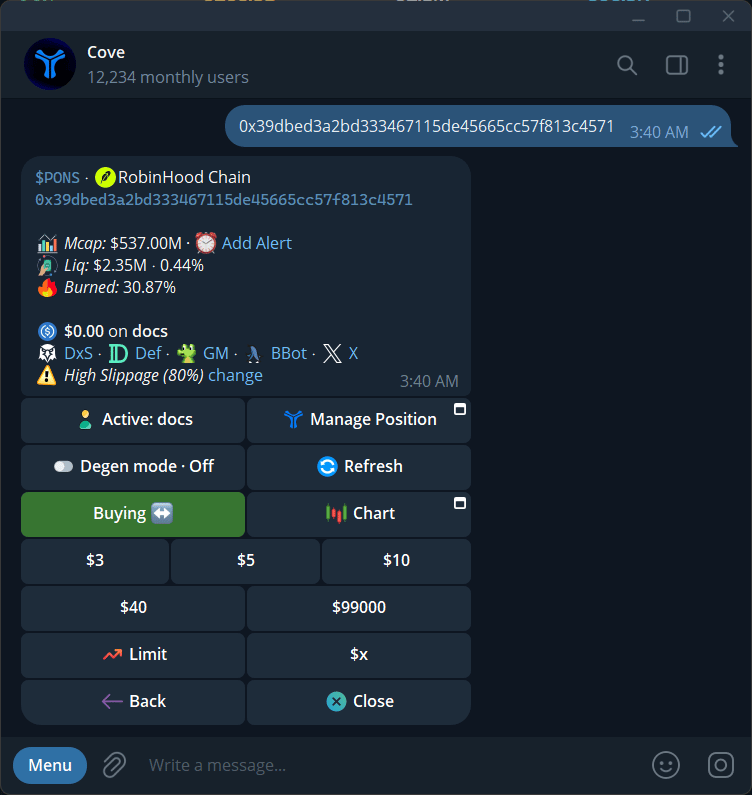
Paste the token’s contract address or a supported token link into the bot. Select the intended chain if asked.For an Arc token, choose Arc if prompted and check that Arc appears on the token panel.Check the token address, chain, selected wallet, and any warnings. Make sure the panel is on Buying.
An example Buying panel; presets and slippage are saved user settings, not recommendations.
4
Choose an amount and buy
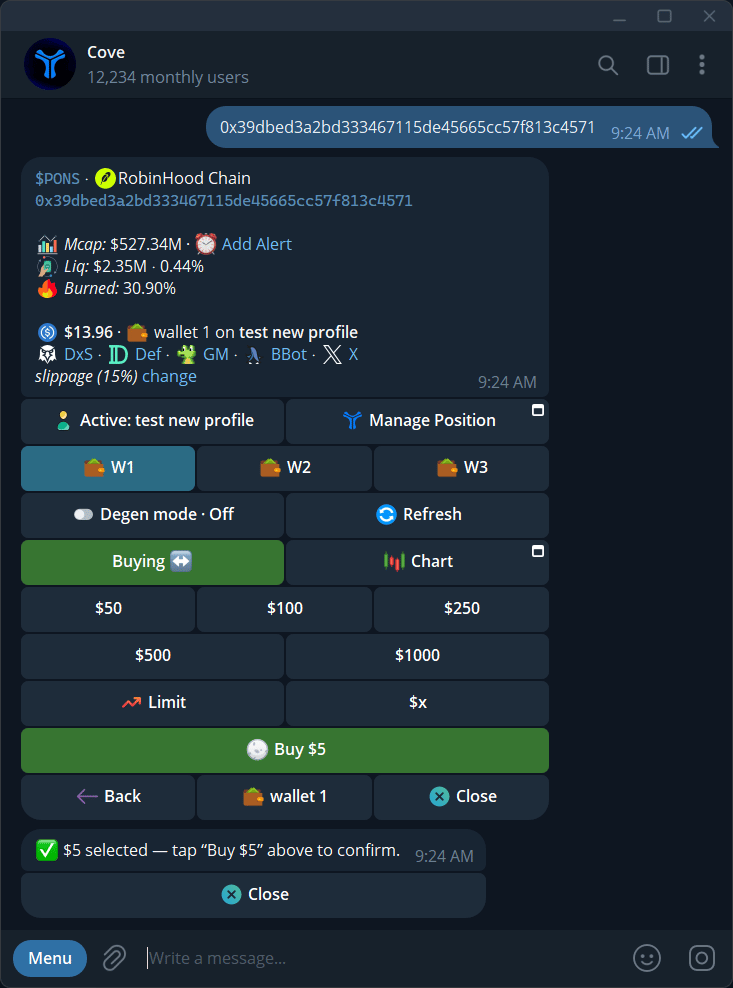
For a separate confirmation like the one below, first open /settings → Trade panel settings and enable Buy confirm, then return to the token panel.Tap $x to enter a custom USD amount, or choose a preset. Check the amount and wallet, then tap Buy with the displayed amount when ready. Read any additional warning or fee prompt before proceeding.
Buy confirm is off by default. Without it, choosing a preset or entering a custom amount can submit the purchase immediately.
With Buy confirm enabled, the selected amount appears on the final Buy button.
5
Check the purchase result
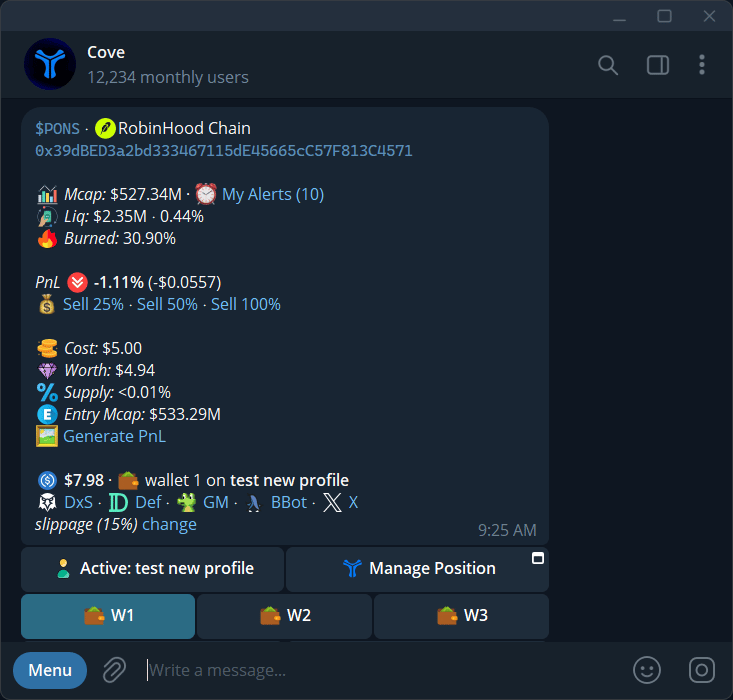
Wait for Buy Executed and check Spent and Received. Spent includes the trading fee. If the purchase is still processing, wait for its result before trying again.The token panel now shows your holding: Cost, Worth, and PnL. The screenshot below shows this updated position, not the execution receipt.
After a buy, the token panel shows your position's cost, current worth, and PnL.
6
Find your token in Positions
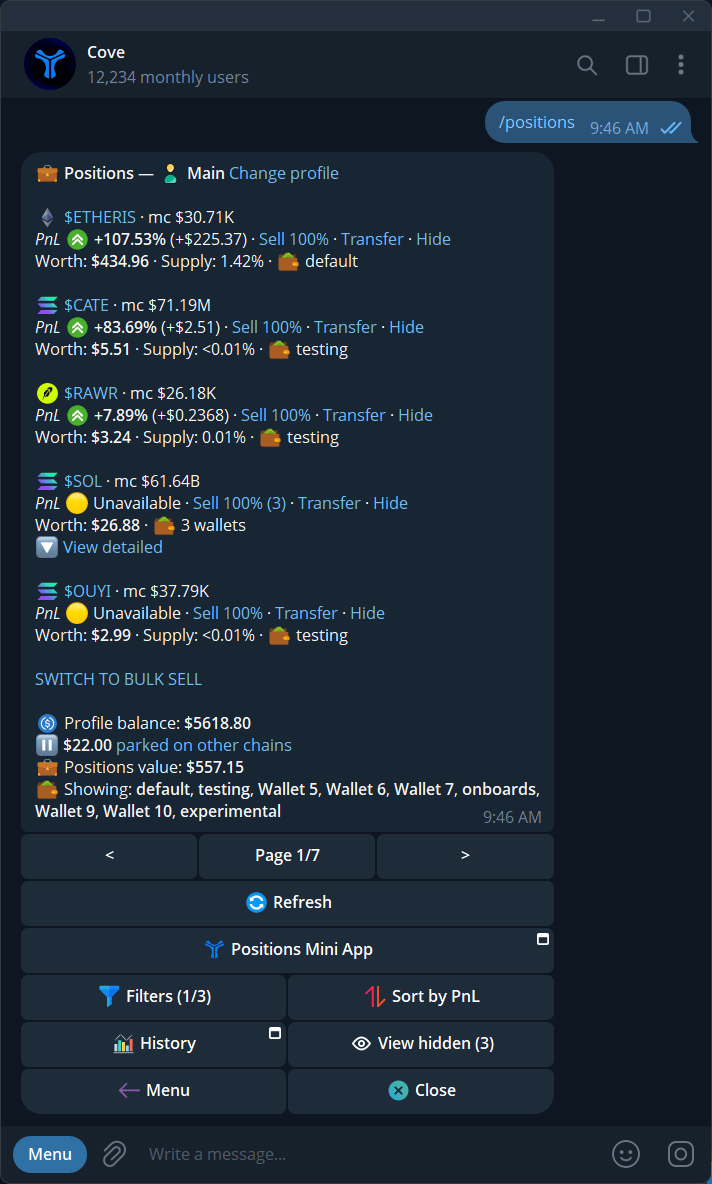
Send /positions or tap Positions in the main menu. Find your token in the list and check its Worth and PnL. Tap the token’s ticker to reopen its trading panel.If it is missing, tap Refresh and check the selected profile and filters. See View and manage positions for more options.
The /positions list shows your holdings, their current worth, and PnL.